
Is Your IT Company There To Help When You Really Need It?
Right Click delivers high-touch 24*7 IT support with onsite service, proactive optimization, and personal relationships that help businesses across Greater LA modernize, scale, and succeed.


How Can We Help?
Schedule a 15-minute call to figure out if we're a good fit for your business.


meet Your INDEPENDENTLY OWNED AND Client-FOCUSED California IT team

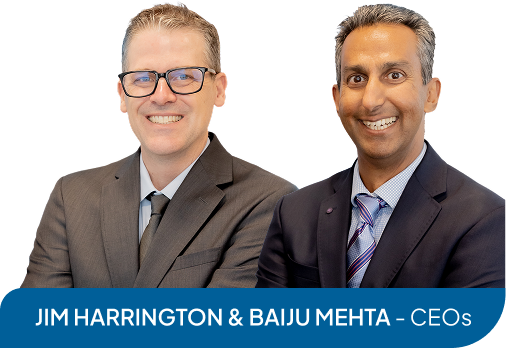
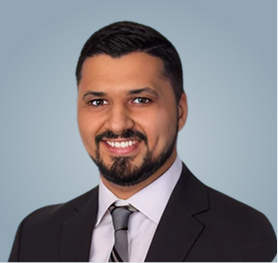
Baju Mehta
CO-CEO
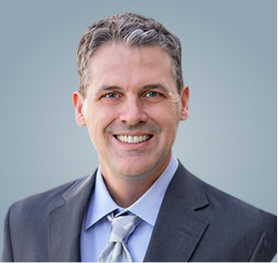
Jim Harrington
CO-CEO

Avi Lall
VP of Operations

Gary Venegas
sr. MSP engineer

Kamran Askari
Network Engineer
Krishan Odedra
Sr. project engineer

Kelly McQueen
MSP Engineer

Vishal Udani
MSP Engineer

Joshua Delrosario
MSP Engineer

Juan Ramos
Structured Cabling Technician

Joseph Fasano
Lead Field Technician

Jorge Aguilar
Field Technician II
Curtis McKinney
Field Technician II

Paurav Raghuvanshi
Field Technician II

Dat Nguyen
Field Technician II

kyran Mc Carville
Field Technician

Alexis Petit
Field Technician

Marop Gonzalez
Field Technician

Conner Schnicker
Field Technician

Yoani Preciado
Field Technician

Monica Greene
Service Delivery Manager

Tony Kaczoroski
Customer Success Specialist

Maleeya Davidson
Accounting Manager

Abhijith S.
Accounting Specialist
Mayur Todwal
Accounting Specialist

Tarang Jain
Accounting Specialist

Della Mc carville
Administrative Manager
Diego Nevarez
Purchasing Supervisor

Joshua Babasa
Purchasing Assistant

May Le
Marketing Designer

Jinal Barot
Purchasing Associate

Krutal Shah
Helpdesk Manager
Jaydeep Malnika
General Manager

Sanjay Lalwani
Helpdesk Support Engineer

Urvesh Solanki
Helpdesk Support Engineer

Pradipsinh Jadeja
Helpdesk Support Engineer
Riddhi Barad
Helpdesk Technician

Nisarg Shukla
Helpdesk Support Engineer

Nehal kumar
Helpdesk Support Engineer

Bhadresh Patel
Helpdesk Technician III

Ganpat Shihora
Helpdesk Technician III

Mitesh Patel
Helpdesk Technician III

Somnath Bhattachariya
Helpdesk Technician II

Sinchit Kandpal
Helpdesk Technician

Vikas Rai
Helpdesk Technician

Nisarg Naik
Helpdesk Technician

Mrugesh Anand
Project Engineer

Mit Panchal
Helpdesk Technician

Rahul Patel
Helpdesk Technician

Satsang Patel
Helpdesk Technician

Krish Patel
Helpdesk Technician

Michelle Maseyk
Administrative Assistant

Geleen Ann Ramos
Client Service Specialist
Mo Patel
Client Service Coordinator

Muriel Almeida
Project Assistant
Why Businesses Work with Right Click IT
Client-Focused Leadership
Jim Harrington and Baiju Mehta founded Right Click in 1997 and remain actively involved with clients today.
Onsite Service and 24x7 Support
While many IT companies avoid onsite visits, we provide hands-on support at your location.
Specialized in Your Industry
We focus on AEC, Aerospace and Defense, Healthcare, and Commercial Real Estate with deep expertise.
Microsoft Solution Partner
Our partnership with Microsoft ensures access to the latest cloud and security technologies. We are there to help whenever you need it, whether an IT issue occurs during regular business hours or not.
If You're Tired Of Waiting On Your IT Company To Fix What's Wrong, We Get It
You Deserve a Partner Who Shows Up and Solves Problems
Right Click provides onsite service when problems require hands-on attention, not just remote support that keeps you stuck on the phone. We take time to understand your business challenges and goals, then design solutions that actually support how you work. Our founders remain actively involved with clients, ensuring you get practical answers and responsive service instead of generic troubleshooting scripts.
Call us at (714) 790-9412 today or complete the form below to work with an IT partner that prioritizes personal relationships and actually shows up when technology problems disrupt your operations.
Get The Expert IT Help You've Been Looking For


What We Do

Managed IT Services
Proactive monitoring and support that keeps your systems running reliably every single day.

Cloud Services
Secure migration from on-premises servers to platforms like Microsoft 365, Azure, and Egnyte.

Managed Cybersecurity
Comprehensive protection that defends your data and meets industry compliance requirements.

Governance & Compliance
CMMC consulting and compliance frameworks for Aerospace, Defense, Healthcare, and regulated sectors.

Custom AI Solutions
Automated workflows that eliminate repetitive tasks so your team focuses on strategic work.

Onsite IT Support
Hands-on service at your location when remote troubleshooting cannot resolve critical technology issues.
What Clients Say About Us
We Noticed The Problem, They Handled Everything
“With our business rapidly growing, we realized our outdated operating systems needed to be improved. Through the recommendation of a friend, Right Click was brought onboard. Jim, proved to be more than instrumental in helping us with this task. Our only part in this process was to realize the problem.”

LASZLO J. LAK
LJL Engineering
Service-First Team That Always Follows Up
“Right Click, Gary, and all the staff that I have been dealing with have proven to me over and over AND OVER again that service is their #1 priority. Following up to ensure that I have been satisfied with their service is also something Right Click does, always. It is my sincere belief that Right Click has put together a team that is unparalleled in making sure that both my company and I have been satisfied.”

SAM MARTLARO
President, S&D Tool
Worked Overnight To Restore Our Critical Systems
“You have helped us tremendously in updating the new version of Quickbooks (our old version was outdated and service was already interrupted). We appreciate it so much. You worked all night long up to the wee hours of the morning, just to get our server files updated and re-booted. We did get into some minor problems and glitches which were readily fixed.”

TEMMY VILLAMIL
Corporate Controller, IDS Group
Professional Team That Goes the Extra Mile
“OMG! Right Click is truly an outstanding company. They are innovative, highly responsive, and constantly striving to improve their services. Their support system is well-structured and efficient, and the team demonstrates strong professionalism and responsibility—especially Monica, whose dedication and reliability are truly appreciated. Thank you for your continued support. I would confidently recommend Right Click to any company in need of professional IT services.”

Cecelia Chen
Efficiency-Focused Experts Who Respond Fast
“OMG! Right Click is truly an outstanding company. They are innovative, highly responsive, and constantly striving to improve their services. Their support system is well-structured and efficient, and the team demonstrates strong professionalism and responsibility—especially Monica, whose dedication and reliability are truly appreciated. Thank you for your continued support. I would confidently recommend Right Click to any company in need of professional IT services.”

Steve
Responsive Experts Who Truly Care
“Jim, showed up and within 10 seconds figured out what my problem was with my printer. He then did a very thorough review of my computer and implemented a few improvements to my security safeguards, but kept if simple for me to monitor.
Great guy and very timely in responding to my problems.
Highly recommend using him!”

Louis Miramontes
The IT Insight You're Looking For
Our blog covers IT strategies, cybersecurity best practices, cloud migration guidance, and industry-specific technology insights for businesses in AEC, Aerospace and Defense, Healthcare, and Commercial Real Estate.

IT Integration Pitfalls in Mergers & Acquisitions, and How to Avoid Them
Mergers and acquisitions (M&A) are exciting growth opportunities, but they also expose technological weaknesses that can derail a deal. ...more
More Profit
April 20, 2026•8 min read

CMMC Compliance Guide for Business Owners: Scope, Cost, Timeline, and What Auditors Actually Check
The Cybersecurity Maturity Model Certification (CMMC) is the Department of Defense program that verifies contractors protect Federal Contract Information (FCI) and Controlled Unclassified Information ... ...more
Work Smarter ,Case Studies
April 20, 2026•9 min read

AEC Tech Challenges: 5 IT Bottlenecks That Slow Down Architecture, Engineering, and Construction Firms
A project can be perfectly designed on paper and still lose time every day because of the wrong workstation, slow file access, messy licensing, unmanaged phones, or rushed onboarding. ...more
Work Smarter
April 20, 2026•8 min read
Frequently Asked Questions
How do I know if my business needs managed IT services?
If your team spends time troubleshooting technology instead of working, or if you lack proactive monitoring and security, managed IT services provide consistent support. Right Click helps businesses maintain reliable systems while focusing on growth.
What industries does Right Click specialize in serving?
We focus on Architecture Engineering and Construction, Aerospace and Defense, Healthcare, and Commercial Real Estate, though we support businesses across many sectors. Our expertise includes AutoCAD environments, CMMC compliance, cloud file servers, and serverless office solutions.
Does Right Click provide onsite support or only remote help?
We provide both onsite and remote support depending on what your situation requires. While many IT companies avoid onsite visits, Right Click offers hands-on service at your location when problems need immediate attention.
How long does it take to migrate from on-premises servers to the cloud?
Migration timelines vary based on your infrastructure size and complexity, but Right Click designs transitions that minimize disruption to daily operations. We work with platforms like Microsoft 365, Azure, and Egnyte to build secure systems that support modern workflows.
Partner With an IT Company That Really Shows Up
Technology problems disrupt your operations and cost your business money when providers take hours or days to respond. Right Click delivers onsite service when you need it, proactive monitoring that prevents issues, and personal relationships with our team.
Call (714) 790-9412 today or click the button below to schedule your appointment and experience IT support that prioritizes your needs.